The vulcanized rubber soccer ball was designed in 1855 by Charles Goodyear. Since then, more innovations have been applied to modern soccer balls used in the 21st century.
In recent times, soccer balls are almost available in most stores around your neighborhood. However, most of these soccer balls come at a high price.
Soccer balls are prone to tears and punctures. It’s easy to get a new replacement but making an effort to fix it can save you some money.
So how can you fix a hole in your soccer ball? In this article, we will examine different methods to fix a hole in a soccer ball.
Read more:
Quick Navigation
- How to fix a hole in a soccer ball?
- Stage 1: Ensure all the needed tools are available
- Stage 2: Cut open the seam thread from the side opposite to the inflation valve
- Stage 3: Deflate the inner tube
- Stage 4: Remove the inner tube
- Stage 5: Inflate the rubber tube to identify holes or holes
- Stage 6: Alternative way to find holes on the inner tube
- Stage 7: Fix the inner tube using the repair kit
- Stage 8: Reinflate the Tube
- Stage 9: Deflate the inner tube again
- Stage 10: Reinsert the inner tube into its balloon coating
- Stage 11: Inflate the ball to balance the position of the inner tube
- Stage 12: Thread the seam carefully
- Stage 13: Inflate the soccer ball
- Conclusion
How to fix a hole in a soccer ball?
One of the most frustrating moments you may encounter while playing a soccer game is seeing a hole in your soccer ball. How could you possibly end up with a hole in the ball in the first place?
A hole in a soccer ball may occur when a sharp object pierces through the ball. Soccer balls are pumped full of air to keep them firm and inflated. During gameplay or when not kept properly, an object can create a puncture hole which would cause the ball to deflate.
If the hole is extra small, it may take a while for the ball to deflate. Irrespective of the size of the puncture hole, it’s only a matter of time before it loses its firmness and shape.
As a soccer-loving person, chances are you have at one time or the other, have a soccer ball for fun. If you have ever experienced deflation caused by an object, you don’t need to be a professional to get it fixed.
To fix a hole in a soccer ball, you need to have a little experience with some tools and materials to get the best results. Outlined below are some methods you could follow for an easy DIY fix on punctured soccer balls.

Stage 1: Ensure all the needed tools are available
Before you begin fixing the soccer ball, you need to provide the essential materials and tools required in executing a perfect job. The tools you will require include;
- Curved needle light glue
- A tiny flat screwdriver
- A tube repair kit including patches and putty often used for bicycle repair
- Round-tipped scissors
- Gutermann type polyester thread

Last update on 2023-11-11 / Affiliate links / Images from Amazon Product Advertising API
With these tools available, you’re well on your way to fixing that hole on the soccer ball. However, it’s important you understand how to use and handle them before usage. Read and acquaint yourself with the individual safety measures, if you’re not familiar with them.
You also have to add a portable, eco-friendly ball pump to the list of tools required for this job. The ball pump will come in handy when you need to inspect the ball for leakage after repair.

- FEATURES: Eco-friendly, Don't use electricity,you can inflate your sports balls to tip-top shape for...
- EASY TO USE: Kids can also be easy to use the plastic tapered nozzle for inflatable toys and...
- PRACTICAL AND GUARANTEED ACCESSORIES: Comes with 4 metal pin needles/2 removable and flexible rubber...
Last update on 2023-11-11 / Affiliate links / Images from Amazon Product Advertising API
Stage 2: Cut open the seam thread from the side opposite to the inflation valve
Most modern soccer balls are designed using different materials for both the interior and exterior parts of the ball. On the inside, soccer balls are often made with butyl or latex rubber inner tubes.
This unique rubber bladder enables the soccer ball to get pressurized whenever you inflate it. On the outside, the soccer ball comes with synthetic leather, regular leather, polyurethane, or PVC panels.
In some cases, the external surface of the soccer ball can be embossed, textured, or weaved to improve ball touch and control. Regardless of the material type used for the outer covering, you would still have to cut through to access the rubber tube inside.
Note: the rubber tube is the main material to hold all the pressurized air.
The essence of cutting the seam thread at the opposite end of the inflation valve is to avoid damaging the ball. During this process, the tiny flat screwdriver should be used in lifting the sewn thread. This will help in minimizing any damage to the edge of the ball.
When you successfully open the ball, proceed to the next stage.
To avoid further complications or causing more damage, as you continue creating access to the inner ball, ensure that you do not damage the ball’s dowel.

Stage 3: Deflate the inner tube
This method may appear a bit complex depending on the type of soccer ball. In general, soccer balls are covered with a polyester thread which is glued slightly to them.
Before you will ever consider fixing the ball, you must deflate the inner rubber tube to its minimal range. The essence of deflating the ball is to enable it to come out of the opening you have just created.
Step 1: Lubricate the valve
To flatten a ball, you need to get the required supplies. First, you will need a lubricant to lubricate the valve.
You don’t have to rely on an expensive lubricant to actualize success. Water can serve as an essential lubricant to use.
You will also need a needle to make the process much easier. Begin by lubricating the valve with water.
Step 2: Lubricate the needle
Proceed to lubricate the needle before inserting it gradually at a right angle to the ball. This action will trigger a hissing sound from the ball’s valve.
Step 3: Listen for air expulsion
Once you begin to hear this sound, endeavor to hold the needle firmly in that particular position. You can hold the ball firmly by pressing into it to push out more air and fasten the process.
At this point, you must ensure that the needle is prevented from snapping. When you completely deflate the ball, proceed to the next stage.

Stage 4: Remove the inner tube
The primary aim of deflating the ball is to enable an easier removal process of the inner tube. In almost all soccer balls, the inner tube is often glued to the valve block.
The essence of this action is to enable you to extract the ball without applying much force. As you pull the inner tube out, carefully ensure that there is no resistance to the process.
Stage 5: Inflate the rubber tube to identify holes or holes
For proper analysis of the extent of damage, you’ll need to examine the inner rubber tube carefully to find all holes.
Step 1: Inflate the inner tube
With the tube successful out of the outer covering, inflate it gently why carefully looking out for holes and leakages.
Step 2: Look for visible holes
Depending on the extent of the ball puncture, some holes can easily be seen with the naked eye. It’s important you pay close attention to this process to avoid making a repeat.
Step 3: Press for leakages
Firmly hold the inflated inner tube in your hand and press inwards, gently. This will help identify other possible holes you might have missed.
Step 4: Mark the leakage holes
At every stage of identifying holes on the inner tube, mark the spots where you noticed leakages. This will help you remember the exact area where the hole(s) are located.

- Soft Cover: The foam cushioning system gives these soccer balls a soft, responsive feel which will...
- All Weather PVC Cover: The PVC ball covering makes this ball water resistant so you can be confident...
- Official sizes: Comes in sizes 3, 4, and 5 with precise stitching and official sizing so it can be...
Last update on 2023-11-11 / Affiliate links / Images from Amazon Product Advertising API
Stage 6: Alternative way to find holes on the inner tube
If you want to trace the hole even faster, you need to deploy a unique method to actualize this. After inflating the ball, immerse it inside a container filled with water.
The essence of taking action is to ensure that you discover all the holes in the ball. The escaping air from the tube, when in contact with the water, creates a bubble-like effect. This allows you to locate the holes and make markings before deflation.
Stage 7: Fix the inner tube using the repair kit
Once you identify the hole, the next step is to fix it. With your repair kit ready, this process will be easier to accomplish.
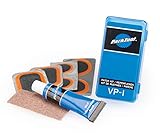
- The VP-1 Patch Kit includes six thin and flexible patches with tapered edges to blend with the...
- A tube of self-vulcanizing fluid bonds the patch to the tube at the molecular level.
- Each kit is packaged in a small plastic box with sandpaper for cleaning the tube and instructions.
Last update on 2023-11-11 / Affiliate links / Images from Amazon Product Advertising API
Step 1: Scrap the surface
Begin by scraping the surface of the inner tube using the abrasive paper or special grater blade contained in the repair kit. Ensure that you do not apply much pressure during the scrapping process to avoid further damage.
Step 2: Apply the putty
Once the surface surrounding the hole is smooth enough, proceed to generously apply the putty over the hole. After this stage, do not glue immediately. Wait for some minutes before gluing the hole with the prepared piece.
As you seal the hole, ensure that you apply uniform pressure on the surface. You should maintain this pressure for some minutes before releasing the tube.
Step 3: Hold it steady firmly to cure
It is advisable to keep this moderate pressure for about 30 minutes to obtain a realistic result. This timeframe may be too long to hold onto the surface with your fingers and hands.
For better results, use a clamp to grab the applied piece. After 30 minutes, remove the clamp and wait for some time before inflating the tube.
Stage 8: Reinflate the Tube
By proper curing, you should wait for 12 hours before inflating the tube. The essence of reinflating the tube after sealing is to ensure no air leaves through the hole.
If you ignore this stage and restore the tube, you may need to repeat the entire process as leakage may still exist without your knowledge.
Endeavor to verify your work to ensure that you have not wasted your time before restoring the inner tube into its outer covering. After reinflating the ball, you can place it in water to ensure a perfect seal.
If there’s still leakage, repeat the procedures above. When you are satisfied with the accurate seal, reposition the exterior cover for reattachment.
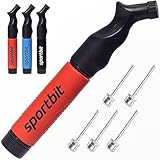
- Ball Pump with Ergonomic Design – Made for your comfort with a soft mold that fits perfectly in...
- Push-Pull Air Delivery System – Inflates when you push and when you pull, the best of exercise...
- Needles Don’t Bend - Our unique soft needle plug system prevents the needles from bending; This...
Last update on 2023-11-11 / Affiliate links / Images from Amazon Product Advertising API
Stage 9: Deflate the inner tube again
When satisfied with the inner tube, you should deflate the tube before reinserting it into its outer coating. Just like you did before, flatten the ball completely to enable easy passage.
Stage 10: Reinsert the inner tube into its balloon coating
Before advancing towards this action, you must ensure that the glue is properly sealed enough to avoid future damage.
As you reinsert the inner tube, ensure that the inflation valves (outer and inner) are positioned perfectly. The essence of taking this action is to ensure that the valve is well-positioned.
Stage 11: Inflate the ball to balance the position of the inner tube
Step 1: Recheck valves positioning
Before you begin to seal the exterior part of the soccer ball, you must ensure that the inner tube is balanced correctly inside the ball. This step is to ensure that you do not restart your work from the first stage. If the inner tube is not balanced, you may mistakenly pass a needle through it during the final sealing.
Step 2: Inflate inner tube
Ensure that the tube is inflated slightly and it balances at the center ball. You are not required to inflate the inner tube to its maximum capacity at this stage. Inflate it slightly to create a room for proper sealing of the exterior leather.
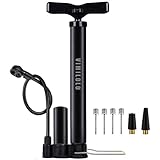
- Durable and stable: Inner and outer tubes are made of high-strength steel, which is more...
- For Presta and Schrader Valves :the tire pump can inflate for bicycles, electric vehicles,...
- Egromically designed comfortable handle,With external booster buffer, easy to inflate, 160Psi Max
Last update on 2023-11-11 / Affiliate links / Images from Amazon Product Advertising API
Stage 12: Thread the seam carefully
Once you have positioned the tube at the center of the ball covering, the next stage is to thread the opening you made earlier on the exterior surface.
Cutting it open appears much easier when you use a proper tool. Closing it back is not a difficult task to implement. However, if you are doing it for the first time, it may seem a bit complicated for you.
Step 1: Use curved needles
Innovative solutions have been deployed in making the process much easier for you. Curved needles have become the best option to use while sealing your soccer ball. As you begin with this process, ensure that the inner tube is not in close contact with the outer cover.
Step 2: Use double threads
Insert a double thread to the curved needle and hold both covers together and sew them. It is recommended to use double threads to make the soccer ball firm. As you do this, ensure that you maintain a steady hand throughout the process. As you sew, endeavor not to create a new hole.
Step 3: Maintain the sewing pattern
Use already existing holes on the cover to pass the needle. You are required to follow a unique pattern as you sew. An irregular pattern will give the ball an off-look. If no hole is skipped, the work will appear clean and precise.
Step 4: Seal it up
When you get to the last opening, seal it accordingly and use the scissors to cut off the leftover thread. You can make use of a lighter to cut off the thread if you have steady hands. However, you must be extra careful to ensure that fire does not affect any part of the soccer ball.
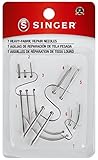
- 7 assorted heavy-fabric repair needles
- Household needles for use on heavy-weight fabrics, perfect for DIY home décor
- For use on carpets, canvas, coats, tents, upholstery, leather, mattresses, furs, and other thick...
Last update on 2023-11-11 / Affiliate links / Images from Amazon Product Advertising API
Stage 13: Inflate the soccer ball
When you have completed the sewing and sealing stage, inflate the ball. Endeavor to keep this inflation within the range of 0.5 to 0.7 bar.
Adding pressure beyond 0.7 bar to the inner tube may expose the soccer ball to several other damages. You definitely wouldn’t want that to happen again.
If you keep the pressure under 0.5 bar, there’s not enough air and pressure to keep the ball firm to enable proper handling and control. It is for this reason, it is imperative that you ensure that your soccer ball is pumped as high as 0.5 bar but not more than 0.7 bar.
Having successfully restored your punctured soccer ball, you should ensure the ball is properly kept. Here are quick preventive ways to ensure you do not have to repeat this process in the foreseeable future.

Keep Soccer ball safe from shaped objects
To ensure that your soccer ball does not get another opening over time, ensure that you look out for sharp objects with a pointed edge. If you prefer to play the soccer ball in your neighborhood, it is advisable to minimize the rate at which you kick the ball.
Encourage your teammates to take caution when they play the ball. When the inner tube has been subjected to frequent patching, it may become too weak to withhold the air pressure pumped into it.
Inflate properly while playing
For better performance, soccer balls need to be properly inflated before use. Underinflation or overinflation can cause severe damage to the ball.
Check your goal areas regularly
In most situations, the goal area is one of the most extreme places with sharp edges in a soccer pitch. If you fail to inspect the goal areas, you may end up creating a hole in your ball.
Before playing each game, walk around to ensure that the environment is cleared. If you notice any sharp object at the goal net or goal post, make an attempt to remove it before playing.
Inspect the ball after each match
When you have completed each soccer game, look out for puncture holes in the ball. If a hole is created, a hissing sound will be produced as the ball slowly deflates.
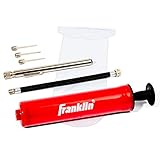
- Complete pump kit: includes a 7.4” pump with flexible extension hose, inflation needles and...
- Inflation gauge: The heavy duty pressure gauge measures psi to make sure you are inflating to the...
- Needles included: Includes 3 needles for pumping up all sizes of soccer balls, footballs,...
Last update on 2023-11-11 / Affiliate links / Images from Amazon Product Advertising API
Conclusion
As you enjoy having fun with your soccer ball, keep in mind that puncture holes may be created in the ball at any time. You may apply all the safety measures and still end up with a hole in your soccer ball.
Whenever you notice a hole in the ball, do not panic or be in a rush to buy a new ball.
If you follow the solutions provided in this article, you should be able to return the ball back to its right shape.
Hi there, I’m Jay.
Soccer is everything in my life! My friends and I have created this blog with all our enthusiasm, passion, and understanding after years of playing pro soccer. Hope you will enjoy it!